How to Configure Charter Email Settings For Outlook?
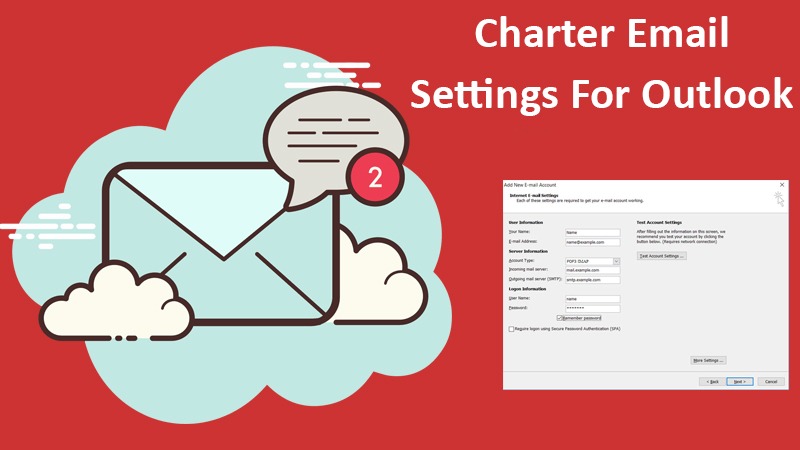
Are you a charter email user who is struggling to set up your account on your device? You’ve come to the right place. Here you can learn how to configure Charter email settings for Outlook. However, setting up an email on an email application is simple, but it can seem a bit daunting when you follow the manual setup. In manual setup, you have to configure the Charter email settings for IMAP and POP accounts for which you can refer to this blog.
In case you are facing any trouble with configuring Charter email settings Outlook. Or at any other step, you can also reach our Charter Support experts for assistance. We are a crew of experienced techs who knows your Charter email inside out. No matter how complicated or daunting your issue is, we can resolve it all in a wink.
How To Create A Charter Email Account?
Don’t have a charter email account but use its services? You can create your email account anytime using the steps mentioned below:
- Visit spectrum.net and sign up for spectrum services.
- Create a new username and password for your spectrum account.
- Sign in to your account using the new account credentials and then click on the Menu option on the upper left side.
- Click on Manage account and then go to Services.
- Select Internet and then click on the Create Email Address option.
- Hit the create a new username option and choose to Create a Mailbox.
- Enter your account password and then click on Finish.
If you are using Spectrum services for business purposes, you will need the Spectrum Business subscription with a registered business domain.
Charter Email IMAP vs POP Account
Before you get started, you must know that you can set up your Charter account using two ways, IMAP and POP. if you don’t know anything account it and you just simply want to use your charter email like any other mail, then you should go on with IMAP. in short, an IMAP account is a normal email account that you can access from anywhere, any device, email application, web browser, etc. it is because all your emails are stored on your email clients server and it is the most recommended account type.
Despite the very benefits of the IMAP account type, many people prefer using a POP account. It is because they are either not in the area where the internet is available round the clock or they want to access their emails only for a particular device due to security reasons. Some other benefits of a POP account are that you have all your email offline and stored on your device. This way, you are not limited to the cloud storage provided by your email provider and can save as many emails as possible on your computer.
Steps To Configure Charter Email Settings On Outlook
Use the below steps if you want to set up a Charter email account (POP) on your Outlook program.
- Open the Outlook application on your computer and then click on the File tab.
- Click on the Add Account option and then enter your Charter email address in the given field.
- Select Advanced options and go to Let me set up my account manually.
- Select Connect and then select your account type as POP.
- In the Incoming Mail Server option pop.charter.net with port number 110.
- In the Outgoing Mail Server, add smtp.charter.net and port number 25.
- Now hit the Connect button and then when the login window appears, enter your Charter email address and account password in the given fields.
- At last, click on OK to apply the settings.
Setup Charter Business Email Account On Outlook Using IMAP
Given below are the steps to configure Charter email settings on Outlook with IMAP as your account type.
- Launch Outlook on your device and then go to the File menu.
- Click on the dropdown menu and then choose the Info/Tools option.
- Now select the Add Account option. If you don’t see the Add Account option, then click on Accounts and then select New.
- Navigate and select Advanced Options and then tick the “Let me set up my account manually” checkbox.
- Select the Connect option or select the “Manual setup or additional server types” option depending on your version of Outlook.
- Hit Next and then on the Choose Service page select the account type as IMAP.
- Hit Connect or Next depending on what you have on your screen.
- On the Account settings page, enter the given below settings:
- First of all, enter your name in the Your Name field.
- Next, you need to enter your complete charter email in the email address field.
- Select IMAP as your Account Type.
- Fill up exchange.charter-business.net in the Incoming Mail Server (IMAP) Name.
- In the Outgoing Mail Server (SMTP) Name, enter smtp.charter-business.net.
- At last, enter your email address in the Username field and then add your password in the Password option.
9. Go to More Settings and click on the Outgoing Server tab.
10. On the Outgoing server screen, make sure the following options are selected.
- My outgoing server (SMTP) requires authentication
- Use the same settings as my incoming mail server
11. Now go to the Advanced tab and then add the following details in the given fields:
- IMAP Incoming server port number 993.
- Select the “This server requires an encrypted connection (SSL)” checkbox.
- SMTP Outgoing Server port number 587.
- Select TLS in the encryption type.
If the 993 port number doesn’t work in the incoming server settings, enter 142 instead. Also, use the SSL encryption type if the TLS option isn’t available.
12. Hit OK to apply your changes and then select Connect/Next.
13. At last, click on Finish to get done with the setup.
You can now access your charter email account from your Outlook program on your computer without any issue.
How to configure Charter email settings on iPhone?
Here are some steps by following which you can easily configure Charter email settings iPhone.
- Visit Settings and choose Mail, Contacts, and Calendar option.
- Hit the Add Account option >> Other >> Add Mail Account.
- After that, you have to enter the Name, Email, Password, and Description in the New Account menu. Click Next.
- Select the IMAP option and it will highlight the section in blue.
- Under Incoming mail server settings, type imap.mailanyone.net in the hostname. And now type your complete email address and password in the username and password section.
- In the Outgoing mail server settings, you have to input smtp.mailanyone.net in the hostname. Again type your login credentials in the username and password field.
- In the end, click on the Save button. This will help you to configure Charter email settings for iPhone.
How can I configure Charter Email Settings for Android?
However, if you are searching for how to configure Charter email settings Android? Then you are in the right place. Here you will get all the steps that assist you in configuring Charter email settings for Android.
- Firstly, you have to click on the Settings option >> Add Account.
- Tap the Email button and mention the following details such as:
- Email- your complete email address.
- Password- the password you set for the account.
3. Hit the Manual Setup option.
4. This time it will ask what type of account, then choose IMAP Account.
5. Input the following details in the Incoming Server Settings such as:
- imap.mailanyone.net- Hostname
- Your complete email address- Email
- Type your password- Password
- 143- Port
- None- Authentication type
6. Enter the following details in the Outgoing Server Settings:
- smtp.mailanyone.net- Hostname
- Full email address- Email
- Write your Password- Password
- 2500- Port
- None – Authentication type
- Also, mark the checkbox of Require Sign-in option.
Also Read: How can I fix Charter net email issues?
Configure Charter email mobile settings for Outlook
To configure Charter.net email settings on mobile, you have to follow some steps such as:
- First of all, you have to open the Outlook app.
- After that, click on the Email option >> Add Account >> IMAP.
- To set up Spectrum email on your mobile, then ensure the following email server settings:
- Write the complete Spectrum email address in the Username field.
- Now, enter your Spectrum email password.
- For authentication, use the SSL type.
- For the incoming server, type 993 in Port Number. And for the outgoing server, type 587 in Port Number.
- Mark check on the Requires Authentication option.
Ways to set up Charter email settings for Windows 10
- Go to the Start menu and hit the Mail option.
- Tap on the Add Account option and choose the Advanced Setup.
- Under Advanced Setup, click on the Internet Mail option.
- Now, input the email server settings as mentioned above.
- Implement all the on-screen instructions carefully. This is how you can set up spectrum email settings for Windows 10.
Conclusion
In case, you experience Charter email settings for Outlook with the above-mentioned procedure, you can contact our Charter Email Support techs for help. Feel free to give us a call on our helpline or just leave us a message anytime. We will provide you instant steps by which you can configure Charter email settings on your system.