How to turn on or off Focused Inbox in Outlook?
Focused inbox in Outlook is an amazing feature that analyzes the quality of incoming mails and filters them out to avoid overflowing emails in the inbox. It also keeps the important mails in the Focused inbox whereas the rest of the mails are sent to the ‘Other’ tab. However, in this comprehensive guide about Outlook Focused Inbox, we will help you get started with the Focused inbox feature. And how to manage it in the Outlook app or on the web. Here you will get to know how to enable or disable Focused Inbox in Outlook desktop app, mail app, and in Outlook web. Also, you will learn how to Focused Inbox in Outlook.
How to enable or disable Focused Inbox in Outlook desktop app?
If you’re using Outlook 2019, Outlook 2016, or if you want to turn Outlook from Office 365, then you can manage Outlook Focused Inbox using the instructions below.
How to Enable Focused Inbox in Outlook?
Follow the steps given below to automate the Focused inbox feature-
- First, click on the Outlook app to open it.
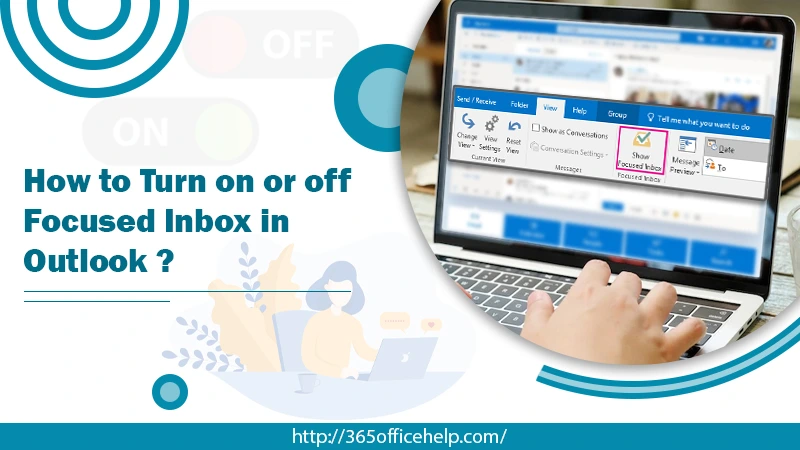
- In the next step, Move your cursor on the View tab in the topmost bar.
- Select the Show Focused Inbox option to enable Focused inbox.
On completing the steps listed above, you will be able to see two separate tabs- one ‘Focused inbox’ and ‘Others’.
How to turn off Focused Inbox?
Disabling the Focused Inbox feature will also bring all your incoming mails to a single folder. Its steps are similar to enabling a Focus inbox. However, following the same steps will revert all the previous changes made this time. To remove focused inbox, follow the steps such as:
- Click on the Outlook app to open it.
- In the next step, Move your cursor on the View tab in the topmost bar.
- Now, click on the Show Focused Inbox option to disable the Focused inbox this time.
Switch between the “All” and “Unread” tabs from the Inbox section to check your new incoming emails.
Steps to turn on and off Focused Inbox in the Mail app
Mail App comes installed in your system if you are using Windows 10. Follow the steps given below to enable and disable the Focused inbox in the Mail app.
How to Enable Focused Inbox in Mail App?
Steps to enable Focused Inbox in the Mail app installed with Windows 10.
- First of all, Open Mail App.
- Find the gear icon and click on the Settings button given at the bottom-right corner.
- In the next step, Move down to the bottom and click on the Focused inbox in the right pane.
- Move down to the drop-down menu and click on the account you want to configure.
- Switch on the ‘Sort messages into Focused and Other’ toggle switch.
This will sort your incoming emails into two different sections. One will keep the important emails in the ‘Featured Inbox’ and the other will keep the rest of the mails in the ‘Other’ folder.
How to Disable Focused Inbox in Mail App?
After enabling the Focus inbox option, you can easily disable it in the Mail app if you don’t find it useful. Follow the steps given below to disable the option.
- Firstly, open the Mail App.
- Then find the gear icon and click on the Settings button given at the bottom-right corner.
- In the next step, Move down to the bottom and click on the Focused inbox in the right pane.
- Move down to the drop-down menu and click on the account you want to configure.
- Switch off the ‘Sort messages into Focused and Other’ toggle switch by taking it in a different direction.
Disabling the focused inbox feature in your Mail App will bring all your emails to a consolidated inbox as they arise.
How do I enable or disable Focused Inbox in Outlook web?
Although the web version of Outlook also facilitates the use of Focused Inbox in Outlook to its users.
How to Enable Focused Inbox in Outlook Web?
Follow the steps given below to enable Focused Inbox in Outlook web.
- Go to the Outlook.live.com website.
- Sign in with your registered Microsoft account with the login credentials you have.
- Now, find the gear icon and then click on the Settings button given at the bottom-right corner.
- Move to the bottom of the Quick settings and then turn on the Focused Inbox toggle switch.
This will sort your incoming emails into two different sections. However, one will keep the important emails in the ‘Featured Inbox’. And the other will keep the rest of the mails in the ‘Other’ folder.
How to Disable Focused Inbox in Oulook.com?
To disable automatic email sorting in Outlook.com, use these steps:
- Visit the Outlook.live.com website.
- Login with your registered Microsoft account with the login credentials you have.
- Find the gear icon and click on the Settings button given at the bottom-right corner.
- Move to the bottom of the Quick settings and turn off the Focused Inbox toggle switch.
If you turn off focused inbox Outlook, then it will bring all your emails to a consolidated inbox. As they arise and there will be no automated sorting of important mails.
How do I use Focused Inbox in Outlook App?
However the facility of ‘featured Inbox’ is first provided by Outlook, its instructions to enable it in Outlook App are slightly different from other emailing environments. On enabling Outlook amazing feature of ‘Focused Inbox‘, you will see two new tabs under the Inbox section. Namely, the ‘Focused’ and the ‘Other’.
Emails in Focused Tab
After enabling this feature, you will see all your important emails under the Focused tab. Including the emails from work, contacts, and people with whom you interact frequently. Outlook also uses Machine learning to detect the mails which can be important for you. I hope now you have got the answer what is focused inbox?
Emails in Other Tab
Emails that contain newsletters, advertisements, automatically generated messages, and bulk emails are generally sorted in the ‘Other’ tab.
You can modify the settings of the ‘Focused’ tab by right-clicking on the tab.
- Move to Other — This option allows you to move this particular email to the other tab. However, the rest of the emails from the particular sender will keep coming in the Focused tab.
- Always Move to Other — This option will mark the sender and send the mails to the other tab.
This option works vice-versa in the Other Tab. If you’re currently using Outlook.com, the web version, right-click on the email and select the Move submenu to find the modification options.
In the end
One important thing that the developers kept in mind, that users can easily forget to check the Others tab. So, it keeps on showing the count of mails it marked as less important and moved to the others folder. However, if you still need any help, then contact our Outlook Support team.