How to Set Up Email Forwarding in Gmail: A Useful Guide
Everyone with more than one Gmail account is aware of the hassle of forwarding incoming messages to another email address. What if we tell you that there’s a way you can get rid of this lengthy process? Learning how to set up email forwarding in Gmail will help you get all your important emails in one central place.
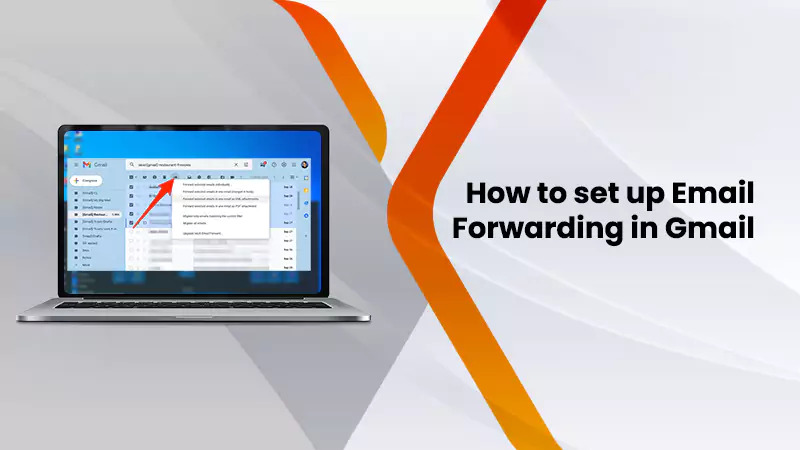
To set up email forwarding, go to ‘Settings’ in your Gmail, followed by ‘Forwarding and POP/IMAP.’ Thereafter, tap ‘Add a forwarding address’ and adhere to the guidelines on the screen.
You may even go a step further and make this process more efficient by installing the free Multi Email Forward extension. Read on to learn more about email forwarding in Gmail.
How to Set Up Automatic Email Forwarding in Gmail
Setting up automatic forward is convenient for those desiring to move all the incoming messages to another email address. Follow this process to set it up on your browser.
- Navigate to Gmail.
- Now, tap the ‘Gear’ icon. It is present at the top right.
- Tap ‘See all settings.’
- Now, click ‘Forwarding and POP/IMAP.’
- In the ‘Forwarding’ area, tap ‘Add a forwarding address.’
- Give an email address where emails will go and hit ‘Next.’
- Tap ‘Proceed’ to confirm.
- Click ‘OK’ in the window to add a forwarding address.
- Exit Gmail settings.
- Now, navigate to an email client and open the account where your forwarded messages will go.
- Find the confirmation email from Google and tap the link in it to confirm the request.
- Click ‘Confirm’ and go back to your Gmail account.
- Go to ‘See all settings.’
- Now, tap the ‘Forwarding and POP/IMAP’ tab.
- Tap ‘Forward a copy of incoming mail to’ in the ‘Forwarding’ section.
- Select the action to that email that moves to the Gmail account in the menu and save your changes.
This is the entire process of Gmail forwarding to multiple emails.
How to Forward Emails in Gmail Via Filters
Do you want to automatically forward only certain types of emails? In that case, use Gmail filters. Configure Gmail forwarding settings to forward only particular emails with these steps.
- Choose the ‘Settings’ icon in your Gmail.
- Now, choose ‘See all settings.’
- Head to the ‘Filters and Blocked Addresses’ tab.
- Here, choose the ‘Create a new filter’ link.
- Input the criteria for forwarding the emails.
- To forward emails from a particular email ID, input that email address, domain, and name besides ‘From.’
- After that, tap ‘Create filter.’
- In the new screen, choose ‘Add forwarding address.’
- Now place a check on the ‘Forward it to’ box.
- Select the address where you want to forward these types of emails. You can find the address in the drop-down list.
- Now, hit the ‘Create filter’ button.
- Now all emails that fulfill the criteria you have set will get forwarded to this email ID.
- You will see a notification of emails being forwarded by your filters a week after configuring this filter.
Steps to edit or remove the forwarding filter in Gmail
If you’ve set up Gmail forwarding filters by following the steps above, you can also edit them anytime. Firstly, bring the list of current filters by using the ‘Filters and Blocked Addresses’ tab. After that, follow these pointers.
- To modify a filter, tap ‘Edit’ to its right.
- Make changes, and after that, hit ‘Update filter.’
- If you don’t want to use a filter or stop its usage, tap ‘Delete’ to its right.
- Now, confirm this action by tapping ‘OK.’
POINT TO NOTE: If you consistently get emails that you can better handle with a different email account, set up a filter to automatically forward those emails.
Can You Set Up Gmail Forwarding to Forward Particular Emails to a Folder
A common question among many users is about how to direct a Gmail email to a particular folder in the inbox. This is possible with the following steps:
- In your Gmail, tap the ‘Show search options’ button. It is present on the search box’s right side.
- Specify your search criteria and click ‘Search.’
- Your action will apply your filter to all emails that fulfill the condition.
- Tap the ‘Show search options’ button again.
- Now choose ‘Create filter.’
- Specify what you want to do with these emails when they come into your inbox.
- Here you can specify the criteria to move it to a specific folder in your Gmail.
- In case you want to apply the filter to earlier emails, choose ‘Also apply filter to matching conversations.’
- Finally, tap the ‘Create filter’ button.
How to Set Up Gmail Forwarding Manually
You can forward a specific email to any address manually. Follow this process if you want to manually forward an email on the browser or the Gmail app on your phone.
- Navigate to the Gmail website in your browser or launch the Gmail application on your smartphone.
- Tap the message you wish to forward.
- Hit the three dots symbol in the message window. This icon is at the right part of the ‘Reply’ button.
- Now, click ‘Forward.’
- Enter the email ID where you want to forward the message.
- Hit ‘Send.’
POINT TO NOTE: If you use Gmail in your browser, right-click an email and select the ‘Forward’ option from the popup menu.
The Steps to Turn Off Gmail Forwarding
Sometimes, you may realize that although you’ve set up Gmail forwarding, its need is not much. Disabling the automatic forwarding in Gmail is the right action. Use these instructions to turn off this feature.
- Access your Gmail account.
- Tap the gear icon indicating the Settings button.
- Now, from the drop-down menu, choose the ‘See all settings’ option.
- After that, tap the ‘Forwarding and POP/IMAP’ tab.
- Now, go to the ‘Forwarding’ area.
- Here, choose the ‘Disable forwarding’ option.
- Disable the message forwarding by tapping ‘Save changes.’
Frequently Asked Questions
Can I set up email forwarding in Gmail?
Yes, to configure Gmail forwarding settings, go to the ‘Filters and blocked addresses’ section in Gmail. Here, configure a filter to send Gmail messages corresponding to specific keywords to a different email address. Ensure that you have added that email address to your Gmail account settings.
How does Gmail forwarding work?
Gmail lets you automatically or manually forward emails to a different account. To manually forward emails, just tap the three-dot icon on the email you wish to forward and press ‘Forward.’ Write the email address to send that message and hit ‘Send.’ But to automatically forward emails in Gmail, you need to add a forwarding email ID in the ‘Forwarding and POP/IMAP’ tab. You will get a verification link in the account where you forward the email. Use it to configure forwarding settings.
How long does Gmail forwarding take?
Gmail forwarding starts working immediately. If you have set up the filters, the forwarding action will not take any time to come into effect.
Wrapping up
Learning how to set up email forwarding in Gmail saves you time. It helps you ensure that all the previous emails are moved to a specific forwarding address. Thus, the time you spend switching between multiple accounts gets minimized. If you want to learn more about it, contact an email technical support service.