Effectual Ways to Setup Outlook Email Account
The Outlook is a standalone email client with power-packed features. Competing from the past many years, it is still a preferred medium for email services. But, to get the most out of Outlook, you will need to add an email account to receive all your messages in one place, import calendars, add contacts, and many other tasks. If you are new to Outlook and want to setup Outlook email, this article is for you. Follow the procedure to create your new Outlook mail.
Know the Difference Between POP and IMAP Email Services
It’s important to understand the POP and IMAP terms if you are going to set up Outlook mail. Read the difference:
POP is an ancient way of transferring emails, works by downloading the new messages to your client and deleting the older texts from the server. IMAP is newly designed that gives access to read messages from multiple devices and allows them to sync amongst all clients. Thus most email services like Gmail, Yahoo, AOL allow for IMAP.
Requirements for Outlook Email Setup Process
Cross-check the requirements needed before you begin with the setup Outlook email process:
- Your Domain name: xyz.com
- Your email address: [email protected]
- And, email password
How to Setup Email in Outlook?
Missing any step might fail to complete the process of setup. Therefore, follow each step given below to perform Outlook email setup:
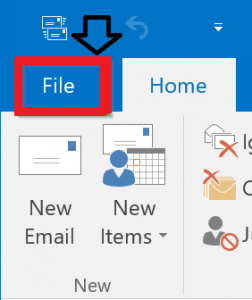
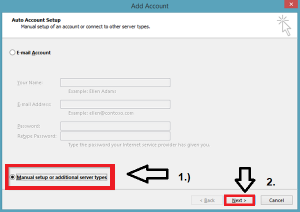
- Firstly, you have to open Microsoft Outlook. And then click on the File menu to open it.
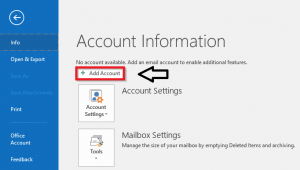
- Hit the Add Account button.
- And choose Manual Setup or additional server types.
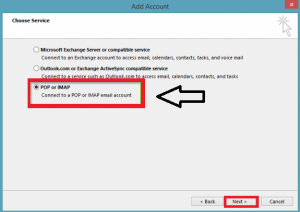
- Then select POP or Outlook IMAP Settings. After choosing it, you have to click the Next button.
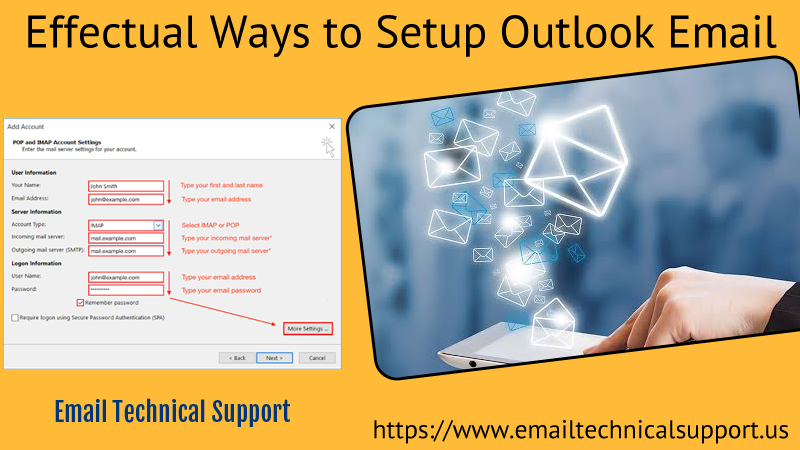
- Now under POP and IMAP account settings, enter your name and email address correctly.
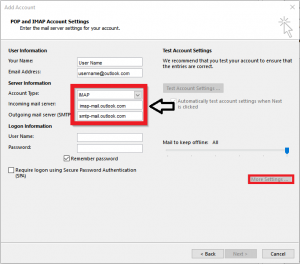
- Fill in the following server information:
- Account type- IMAP
- Incoming Mail Server Settings- imap.mail.outlook.com
- Outgoing Mail Server Settings- smtp.mail.outlook.com
- Username- Your email address
- Password- your password
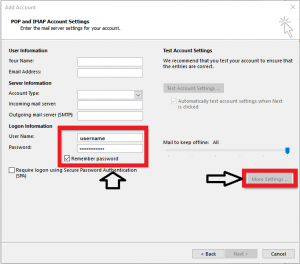
- After filling the server settings, you have to hit the More Settings option.
- Next, visit the Outgoing server tab and open it.
- Under the Outgoing server tab, mark a check on My outgoing server requires authentication.
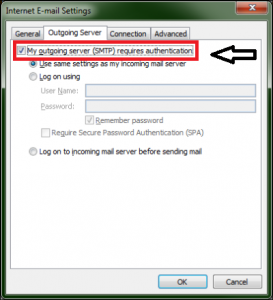
- And also use the same server settings for My incoming mail server.
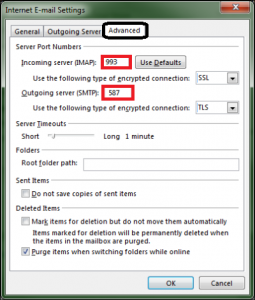
- Visit the Advanced tab and set the following port settings:
- Set Port no 993 for the incoming server. And 587 for the outgoing server.
- SSL/TLS- Yes
- Once it is over, then click on the Next button.
- Although if you are able to log in to your Outlook account. Then close all the tabs.
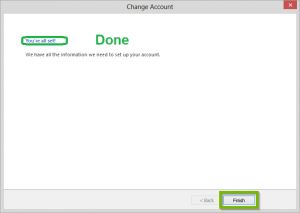
- At last, hit the Finish button >> OK to again start the Outlook. As it will help you to complete the above settings
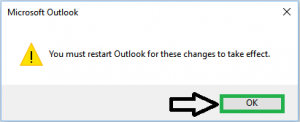
- However, Outlook mail will take some time for the automatic sync.
Read Also: How to configure Outlook .com email settings?
Conclusion
Did you follow the above guidelines that will help you to setup Outlook email and failed to gain the result? Need not worry, there is a matter of chance you may have missed out on any key step. In such a situation, try and get in touch with the technical experts who will assist you throughout. Provide the correct background details about your web service and get assured assistance for Outlook email setup. Our Microsoft Outlook Support technicians are available 24*7. Thus, connect them whenever you come across any issue.